摘编自zxp的博客,遵循CC 4.0 BY-SA版权协议。
开始前的准备
- 安装 vue 项目
- 安装 vuex 插件
- 安装 axios
- 内容仅供学习使用
1. 第一步
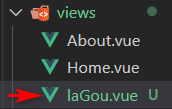
创建一个页面用于存放并展示你获取的数据
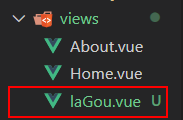
写入基础信息:
1
2
3
4
5
6
7
8
9
10
| <template>
<div> </div>
</template>
-------------------------------------------------
<script>
export default {
name:"laGou",
}
</script>
|
2. 第二步
将该组件导入到路由当中

1
2
3
4
5
| {
path:"/lagou",
name:"/lagou",
component:()=>import("@/views/laGou")
},
|
3. 第三步
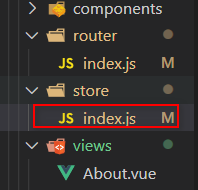
将你的vuex 里面写入使用到的数据
1
2
3
4
5
6
7
| export default new Vuex.Store({
state: {
content:[],
pageNo:1,
pageSize:10
},
})
|
4. 第四步
1
2
3
4
5
6
7
8
9
10
11
| actions: {
async listMore({dispatch,state,commit}){
const {data} = await axios.get("/lg/listmore.json",{
params:{
pageNo:state.pageNo,
pageSize:state.pageSize
}
})
commit("CHANGE_CONTENT",data.content.data.page.result);
},
},
|
5. 第五步
- 当你直接使用的时候会有跨域的错误提示
- 此时应当设置服务代理
- 你需要在项目根目录下新建一个 vue.config.js的文件

1
2
3
4
5
6
7
8
9
10
11
12
13
14
15
16
| module.exports = {
devServer:{
open:true,
host:"127.0.0.1",
port:80,
proxy:{
"/lg":{
target:"https://m.lagou.com",
changeOrigin: true,
pathRewrite:{
"^/lg":""
}
}
}
}
}
|
6. 第六步
第四步说了,我们已经获取了数据,此时我们要通过 mutations 里面的方法来改变 state 里面 content 的值
同样的写在 store 下面的 index.js 的 vue 里面

1
2
3
4
5
6
7
8
9
| mutations: {
CHANGE_CONTENT(state,content){
state.content = [
...state.content,
...content
];
state.pageNo++
}
},
|
7. 第七步
在你的页面上获取你的数据
1
2
3
4
5
6
7
8
9
10
11
12
13
14
15
16
17
18
19
20
21
22
23
| <template>
<div>
<div v-for="item in $store.state.content" :key="item.positionId"> //将你state的content 的数据遍历
<h3>{{item.positionName}}</h3> //显示名字 positionName是拉钩起的名字
<img width="100" :src="item.companyLogo | getImg" alt=""> //显示图片 companyLogo 是拉钩起的名字
</div>
<div><input type="button" @click="$store.dispatch('listMore')" value="加载更多"></div> //点击加载更多,执行 listMore 方法,请求数据
</div>
</template>
<script>
export default {
name:"laGou",
mounted(){
this.$store.dispatch("listMore")
},
filters:{
getImg(v){
return "http://www.lgstatic.com/"+v
}
}
}
</script>
|
8. 第八步
- 在浏览器显示你的内容
- 可以在地址栏写入地址,进入到指定的路由,显示组件
- 也可以在主页面上 使用 router-link 来进行跳转

结果如下:
